How to Make Pumpkin-Shaped Soap with a Hidden Cinnamon Swirl
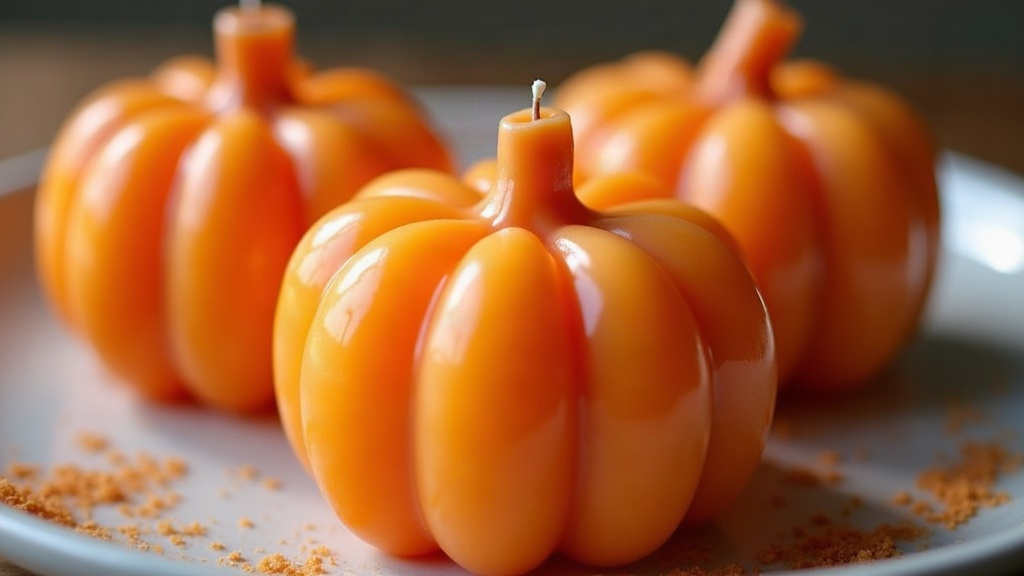
Pumpkin-shaped melt-and-pour soap with a hidden cinnamon swirl might be the most satisfying fall project you can pull off in an afternoon. From the outside, it looks like a tiny carved pumpkin sitting on your bathroom shelf. Cut into it, though, or just start lathering it up, and you find a warm, spicy cinnamon ribbon running through the middle. This guide walks you through the whole process: picking the right base, timing your pours, and getting a swirl clean enough to stay hidden until someone actually uses the bar.
Why This Technique Works So Well
Melt-and-pour (MP) soap is the easiest entry point for beginners because it skips lye handling entirely. No goggles, no gloves, no worrying about caustic burns. You just melt a pre-made soap base, stir in color and fragrance, and pour it into a mold. The “hidden swirl” effect happens because you pour two differently colored and scented layers at specific temperatures, close enough that they blend just a little and create a marbled core, but not so much that they turn into a muddy single color.
Pumpkin shapes are everywhere in October for good reason:
- They look festive without demanding any actual carving skill.
- The round mold conceals the swirl core until the bar gets cut.
- Cinnamon and clove scents just make sense with orange-toned soap.
What You’ll Need
Materials:
- 2 lbs clear or white melt-and-pour soap base (glycerin-based works best)
- Orange soap dye or mica powder (liquid dye tends to blend more evenly)
- Brown or rust-colored mica for the cinnamon swirl layer
- Pumpkin spice or cinnamon fragrance oil (skin-safe, soap-grade)
- Ground cinnamon, optional, for a bit of texture. Use it sparingly since it can irritate sensitive skin
- Silicone pumpkin-shaped mold
- Rubbing alcohol in a spray bottle
- Microwave-safe glass measuring cup or a double boiler
- Thermometer (an $8 kitchen one does the job fine)
- Skewer or thin spatula for swirling
Step-by-Step Instructions
1. Prep Your Workspace
Get your mold, dyes, and fragrance oils laid out before you melt a single cube of soap. MP base sets fast once it hits the mold, and nothing ruins a swirl faster than scrambling for the orange dye while your base is already cooling.
2. Melt the Base in Two Batches
Cut the soap base into cubes. Melt about 70% of it (your orange “pumpkin” layer) in one container and the remaining 30% (the cinnamon swirl layer) in another. Microwave in 20-30 second bursts, stirring in between, until fully liquid. Don’t let it boil. Overheated base turns cloudy and loses that nice glossy finish.
3. Color and Scent Each Batch
- Orange batch: Add dye a drop at a time until you land on a rich pumpkin color. Stir in about 1 teaspoon of fragrance oil per pound of base.
- Cinnamon batch: Mix in the brown or rust mica along with cinnamon or pumpkin spice fragrance oil. A small pinch of real ground cinnamon adds nice texture if you want it.
Let both batches cool to roughly 125-130°F (52-54°C). That’s the sweet spot: still pourable, but no longer hot enough to melt straight into a single muddy blob the second the two colors touch.
4. Pour the Base Layer
Pour most of the orange base into the pumpkin mold, filling it about two-thirds of the way. Give the surface a quick spritz of rubbing alcohol to pop any bubbles.
5. Create the Hidden Swirl
While the orange layer is still soft, not fully set but with a thin skin starting to form (usually 2-4 minutes in), pour a thin ribbon of the cinnamon batch across the center. Drag a skewer through it in a loose “S” or figure-eight motion. Three or four passes is plenty. Keep going and you’ll just mix the colors into mush instead of a marbled swirl.
6. Top It Off
Pour the rest of the orange base over everything to seal the swirl inside. Spritz with alcohol one more time to knock out bubbles and leave a smooth top.
7. Cool and Unmold
Let it set at room temperature for 1-2 hours, or put it in the fridge for 20-30 minutes if you’re impatient (most of us are). Skip the freezer, though. Rapid temperature swings cause condensation, sometimes called “sweating,” on the surface.
Once it’s firm, flex the silicone mold gently and the pumpkin should pop right out.
Troubleshooting Common Issues
- Swirl vanished entirely: The orange layer was still too hot when you added the cinnamon ribbon. Give it an extra minute or two to cool next time.
- Layers separated instead of swirling: The base layer had already hardened before you poured the swirl. Pour the cinnamon layer a bit sooner.
- Soap sweating (little beads of moisture): Pretty common with glycerin soap in humid climates. Wrap the finished bars in plastic wrap for storage and it usually goes away.
Finishing Touches
Stick a small piece of cinnamon stick on top as a “stem” before the final layer sets, or dust the surface with a bit of mica for shimmer. These bars make great fall gifts, craft fair stock, or a seasonal addition if you sell soap online or at a market.
Conclusion
Pumpkin-shaped melt-and-pour soap with a hidden cinnamon swirl isn’t complicated, but it looks like it took way more skill than it actually did. Get your pour temperature right and keep a light hand with the skewer, and your very first batch can look like something you’d find in a boutique shop window. Not bad for an hour of kitchen work during pumpkin season.