Frosted Cranberry Beeswax Votive Candles for Winter Tables
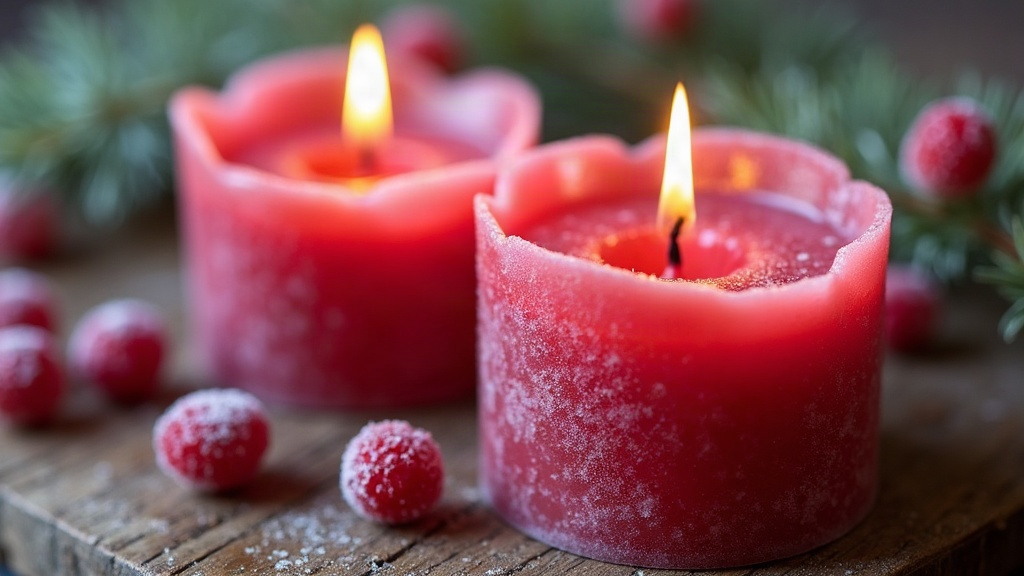
Frosted cranberry beeswax votive candles bring together two things everyone seems to crave once the temperature drops: that warm honey-gold glow and a texture that looks like it was dusted with real snow. Below is a full walkthrough for getting that crackled, frosted finish on genuine beeswax, working in a soft cranberry tint and scent, and then styling the finished votives so your holiday table looks like it belongs in a magazine spread.
Why Beeswax Is the Best Choice for Winter Votives
Beeswax burns cleaner and longer than paraffin or soy. It also carries a natural amber tone that happens to look gorgeous next to cranberry red, almost like it was made for this exact project. And because beeswax melts at a higher temperature, the “frosting” technique described further down actually holds up once the wick is lit, instead of melting away in the first ten minutes.
A few more reasons beeswax wins here:
- Natural honey scent works with cranberry or spice fragrance oils rather than fighting them for attention.
- Slower burn time, which matters when a holiday dinner stretches past two hours and you don’t want to relight candles mid-dessert.
- Non-toxic, soot-reduced burning compared to paraffin. Worth thinking about if your dining room doesn’t get much airflow.
Materials You’ll Need
- 1 lb pure beeswax pellets (plus a small amount of coconut or soy wax, this helps the frosted texture actually form)
- Votive candle molds (silicone is far easier to release from)
- Cotton wick, pre-tabbed, sized for a 2-inch diameter votive
- Cranberry red liquid candle dye, or a small amount of dye chips
- Cranberry, balsam, or clove fragrance oil (optional, keep it under 6% for beeswax)
- Double boiler or a dedicated wax melting pot
- Thermometer
- Wooden skewer or chopstick for wicking
- Heat gun (optional, gives you more control over the shine)
Step 1: Prep Your Molds and Wicks
Center the pre-tabbed wick in each votive mold, then secure it at the top with a wick holder or just a skewer laid across the rim. This small step keeps the wick straight while the wax sets, and it’s the difference between an even burn and tunneling three weeks from now.
Step 2: Melt and Tint the Wax
Melt the beeswax slowly in a double boiler, aiming for 160 to 175°F. Beeswax scorches fast under direct high heat, so patience matters more than speed here. Once it’s fully melted, add the cranberry dye a little at a time until you land on a deep, saturated red (think actual cranberries, not pink lemonade). Pull the pot off the heat before adding fragrance oil, then stir gently for about a minute.
Step 3: Pour and Cool Slowly
Pour the tinted wax into your molds, leaving roughly a quarter-inch of headroom. Let the votives cool at room temperature, no fridge, no freezer. Rapid cooling causes cracking and messes up the frosting later. Slow cooling is also what lets beeswax form its natural crystals, and that’s really the whole secret behind the frosted look.
Step 4: Creating the Frosted Finish
Here’s the part that sets these candles apart:
- Once the votives have fully cured (give it 24 to 48 hours), warm the outer surface briefly with a heat gun or a hairdryer on low. A few seconds is plenty.
- Roll the candle gently between your palms right away. As it cools unevenly, beeswax’s crystalline structure kicks in and produces that soft, cloudy, frosted texture.
- Want a heavier “snow” look? Dip the cooled votive briefly into a second batch of plain, undyed beeswax kept at a lower temperature, around 145°F, then hang it upside down to drip-dry. This builds a pale frosted layer over the cranberry base underneath.
- Trim the wick to ¼ inch before lighting.
Styling Frosted Cranberry Votives for Winter Tables
- Cluster in odd numbers (3 or 5 works best) down the center of the table, mixed in with pinecones, eucalyptus sprigs, or a glass bowl of fresh cranberries.
- Pair with white linens and brass or silver holders so the frosted red glow is the thing your eye lands on first.
- Vary the heights. A few small risers or candlesticks so the flames sit at different levels keeps the whole arrangement from looking flat.
- Scatter real cranberries in a shallow dish of water around the base. It gives you a frozen-berry effect that mirrors the candle’s color almost perfectly.
Troubleshooting Common Issues
- No frosting forming: the wax likely cooled too fast. Pour at a slightly higher temperature and leave the votives alone at room temperature while they set.
- Dye looks muddy: add it in small increments. Too much dye tends to dull the red instead of deepening it, which is the opposite of what you want.
- Wick drowning: trim to ¼ inch, and steer clear of thick wicks on a 2-inch votive, they just can’t keep up.
Final Thoughts
Frosted cranberry beeswax votives are an easy, inexpensive way to add some handmade warmth to a winter table. A short supply list and a little patience during the cooling stage is really all it takes. By the end you’ll have a batch of glowing, snow-dusted candles that feel rustic and elegant at the same time, which is more or less exactly the mood a holiday dinner is going for.