Why Coconut Wax Candles Develop Tiny Air Bubbles After Pouring
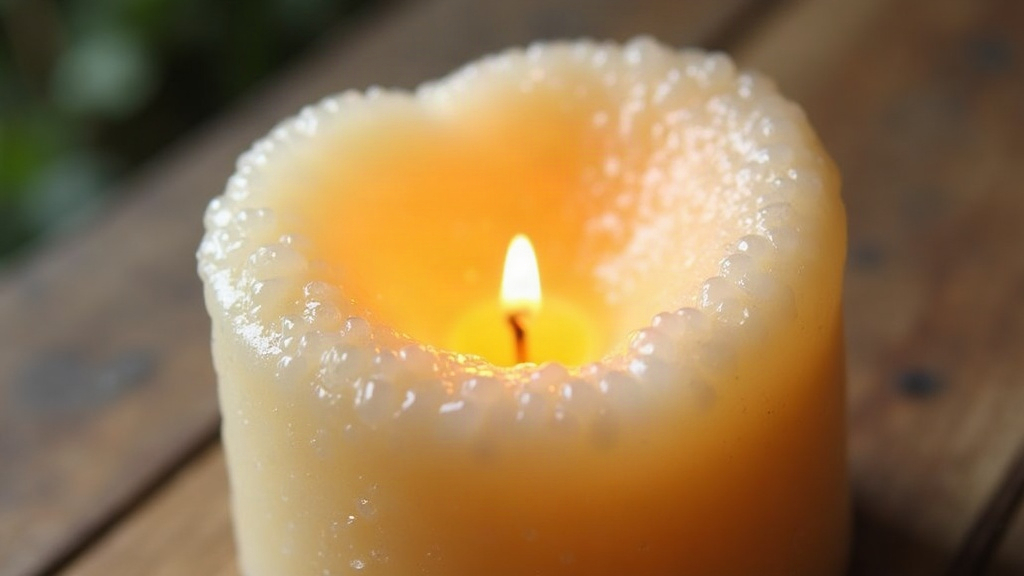
Why Coconut Wax Candles Get Air Bubbles (And How to Stop It)
Those tiny air pockets trapped under the surface or hugging the sides of your coconut wax candle? Nine times out of ten, air got whipped into the wax somewhere between melting, blending in fragrance, and pouring. Coconut wax doesn’t help matters either. Its soft, low-density crystal structure practically invites bubbles to get locked in as it cools. The upside: once you know where the air is sneaking in, this is one of the easiest problems in candle making to fix.
Why Coconut Wax Is Especially Prone to Bubbles
Coconut wax, and coconut blends like coconut-soy or coconut-apricot, have a looser, more open crystalline structure compared to paraffin or straight soy wax. That’s exactly what gives these candles their creamy, smooth finish and strong scent throw. But there’s a trade-off:
- The wax stays fluid and thin for longer while it cools.
- That extra time gives air more room to travel and more chances to get stuck before the wax sets.
- Blending coconut wax with other waxes isn’t always perfectly even, and that unevenness can trap tiny air pockets right at the mixing stage.
Basically, the same softness that makes coconut wax feel luxurious also makes it unforgiving when your technique slips. Nice candle, less nice bubbles.
The Main Causes of Air Bubbles
1. Whisking or Stirring Too Aggressively
Stir melted wax hard, especially while mixing in fragrance oil or dye, and you’re essentially beating air into it like egg whites. A lot of that air won’t rise to the top before the wax starts to thicken.
Fix: Stir slowly, in wide, smooth circles instead of fast whisking. Scrape the sides and bottom gently. No splashing.
2. Pouring Too Fast or From Too High
Pour wax fast, or from several inches above the jar, and you create turbulence. That turbulence traps air right as the wax lands.
Fix: Pour slowly and steadily. Keep your pitcher close, about 1 to 2 inches above the surface, and let the wax run down the side or center in a thin, controlled stream.
3. Wrong Pour Temperature
Pour coconut wax too cold and it thickens fast, sealing bubbles in before they can escape. Pour it too hot, and you risk rapid off-gassing, which leaves surface pitting that often gets mistaken for bubbles.
Fix: Most coconut blends pour best somewhere between 120 and 135°F (49 to 57°C), but check your supplier’s data sheet since blends differ quite a bit.
4. Cooling Too Quickly
Cooling a candle near a drafty window, in a cold room, or (worse) sticking it in the fridge to speed things up causes the outer layer to harden before trapped air has a chance to work its way out.
Fix: Let candles cure at room temperature, around 70 to 75°F, away from fans, drafts, and AC vents.
5. Container or Wick Issues
Moisture sitting inside a glass jar, or a wick that wasn’t fully saturated before the pour, can both create small bubbles clinging to the glass wall or the wick base.
Fix: Containers should be bone dry and at room temperature before you pour. If your process allows it, pre-dip your wicks in wax first.
How to Fix Bubbles After They Appear
Already cured and spotted bubbles? Here’s what to do:
- Minor surface bubbles: A quick pass with a heat gun or hairdryer usually smooths out small surface flaws without touching the wick.
- Larger pockets: Re-melt and repour. Coconut wax handles this well, so nothing’s wasted.
- Bubbles near the wick: Double-check your wick size. An undersized wick can create an uneven melt pool that traps air during that first burn.
Quick Troubleshooting Checklist
- Pour temperature within your wax’s recommended range
- Stirred gently, never whisked
- Poured slowly, pitcher close to the container
- Containers dry and at room temperature before pouring
- Cooling in a stable space, no drafts
- Wick size matched to your container’s diameter
Conclusion
Bubbles in coconut wax candles come down to technique, not a flawed product. Coconut wax is just more sensitive to how it’s melted, mixed, poured, and cooled than most other waxes. Slow your stir down, nail your pour temperature, and give your candles room to cure undisturbed. Do that consistently and you’ll get those smooth, glass-clear tops coconut wax is known for, batch after batch.